You may have one of our ‘I can see clearly now’ calendars and are in awe of some of the print finishing you’ve found inside. Have you considered adding head-turning finishes to your business stationary but haven’t quite had the confidence to start the design process?
We’re here to make the process super easy with this tutorial on how to set up a document ready for printing Spot UV in illustrator.
It is possible to create a spot UV document in both Illustrator and inDesign. For the purpose of this tutorial we are showing you how it is done in Illustrator.
Step 1: Create your business card design
You can create business card designs in either Adobe InDesign or Illustrator.
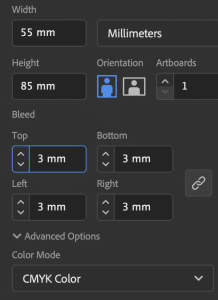
Step 2: Open a new document and set your Artboard size
For a traditional business card size, enter 85mm x 55mm. Add a 3mm bleed and set your colour mode to CMYK. Now click Create.
Step 3: Create 4 Artboards
Artboard 3 and 4 will be your Spot UV layers in the final exported pdf.
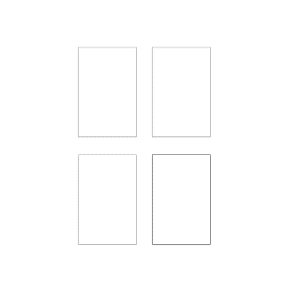
Step 4: Add your artwork
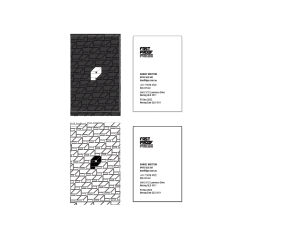
Now you’ll have four artboards. The top two are for your design while the bottom two are for your spot UV layer. Place the front of your design on artboard 1 and the back of your design on artboard 2.
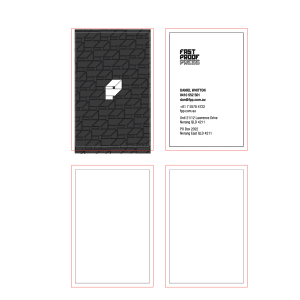
Step 5: Create Spot UV layers
Create your Spot UV layer for the front of your business card on Artboard 3 and the back Spot UV layer onto Artboard 4. To do this, copy and paste the part of the design you’d like to show in Spot UV onto the artboard and change the colour to black (100% K). Patterns work very well with Spot UV printing, but thin lines and small text don’t work too well. Also remove any text or shapes reversed out of a block so your design is completely black.
NOTE: If you only require spot UV on one side of your design, still include all four artboards but leave the artboard blank.
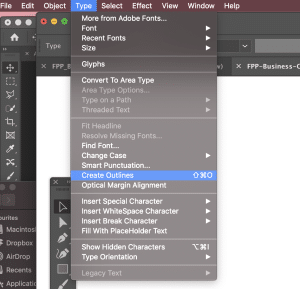
Step 6: Outline text
Before exporting to pdf you should first outline the text to stop any font issues during the printing process and save the file.
Do this by selecting the text box click Type > Create Outlines
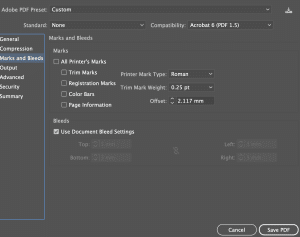
Step 7: Export to pdf
Now we’re ready to transform the artwork into a print-ready PDF file, so click save as PDF.
Choose High Quality Print and check the compression is 300 so images will stay in their high resolution format.
Add trim marks, add registration marks, add a 3mm bleed and click Save PDF.
Step 8: Send to FPP
You should now have a four page PDF, in the correct order and ready for printing. Send the pdf through to us and we’ll supply you with a beautiful product.


Comments are closed.